Auto Scaling
EC2 Basics
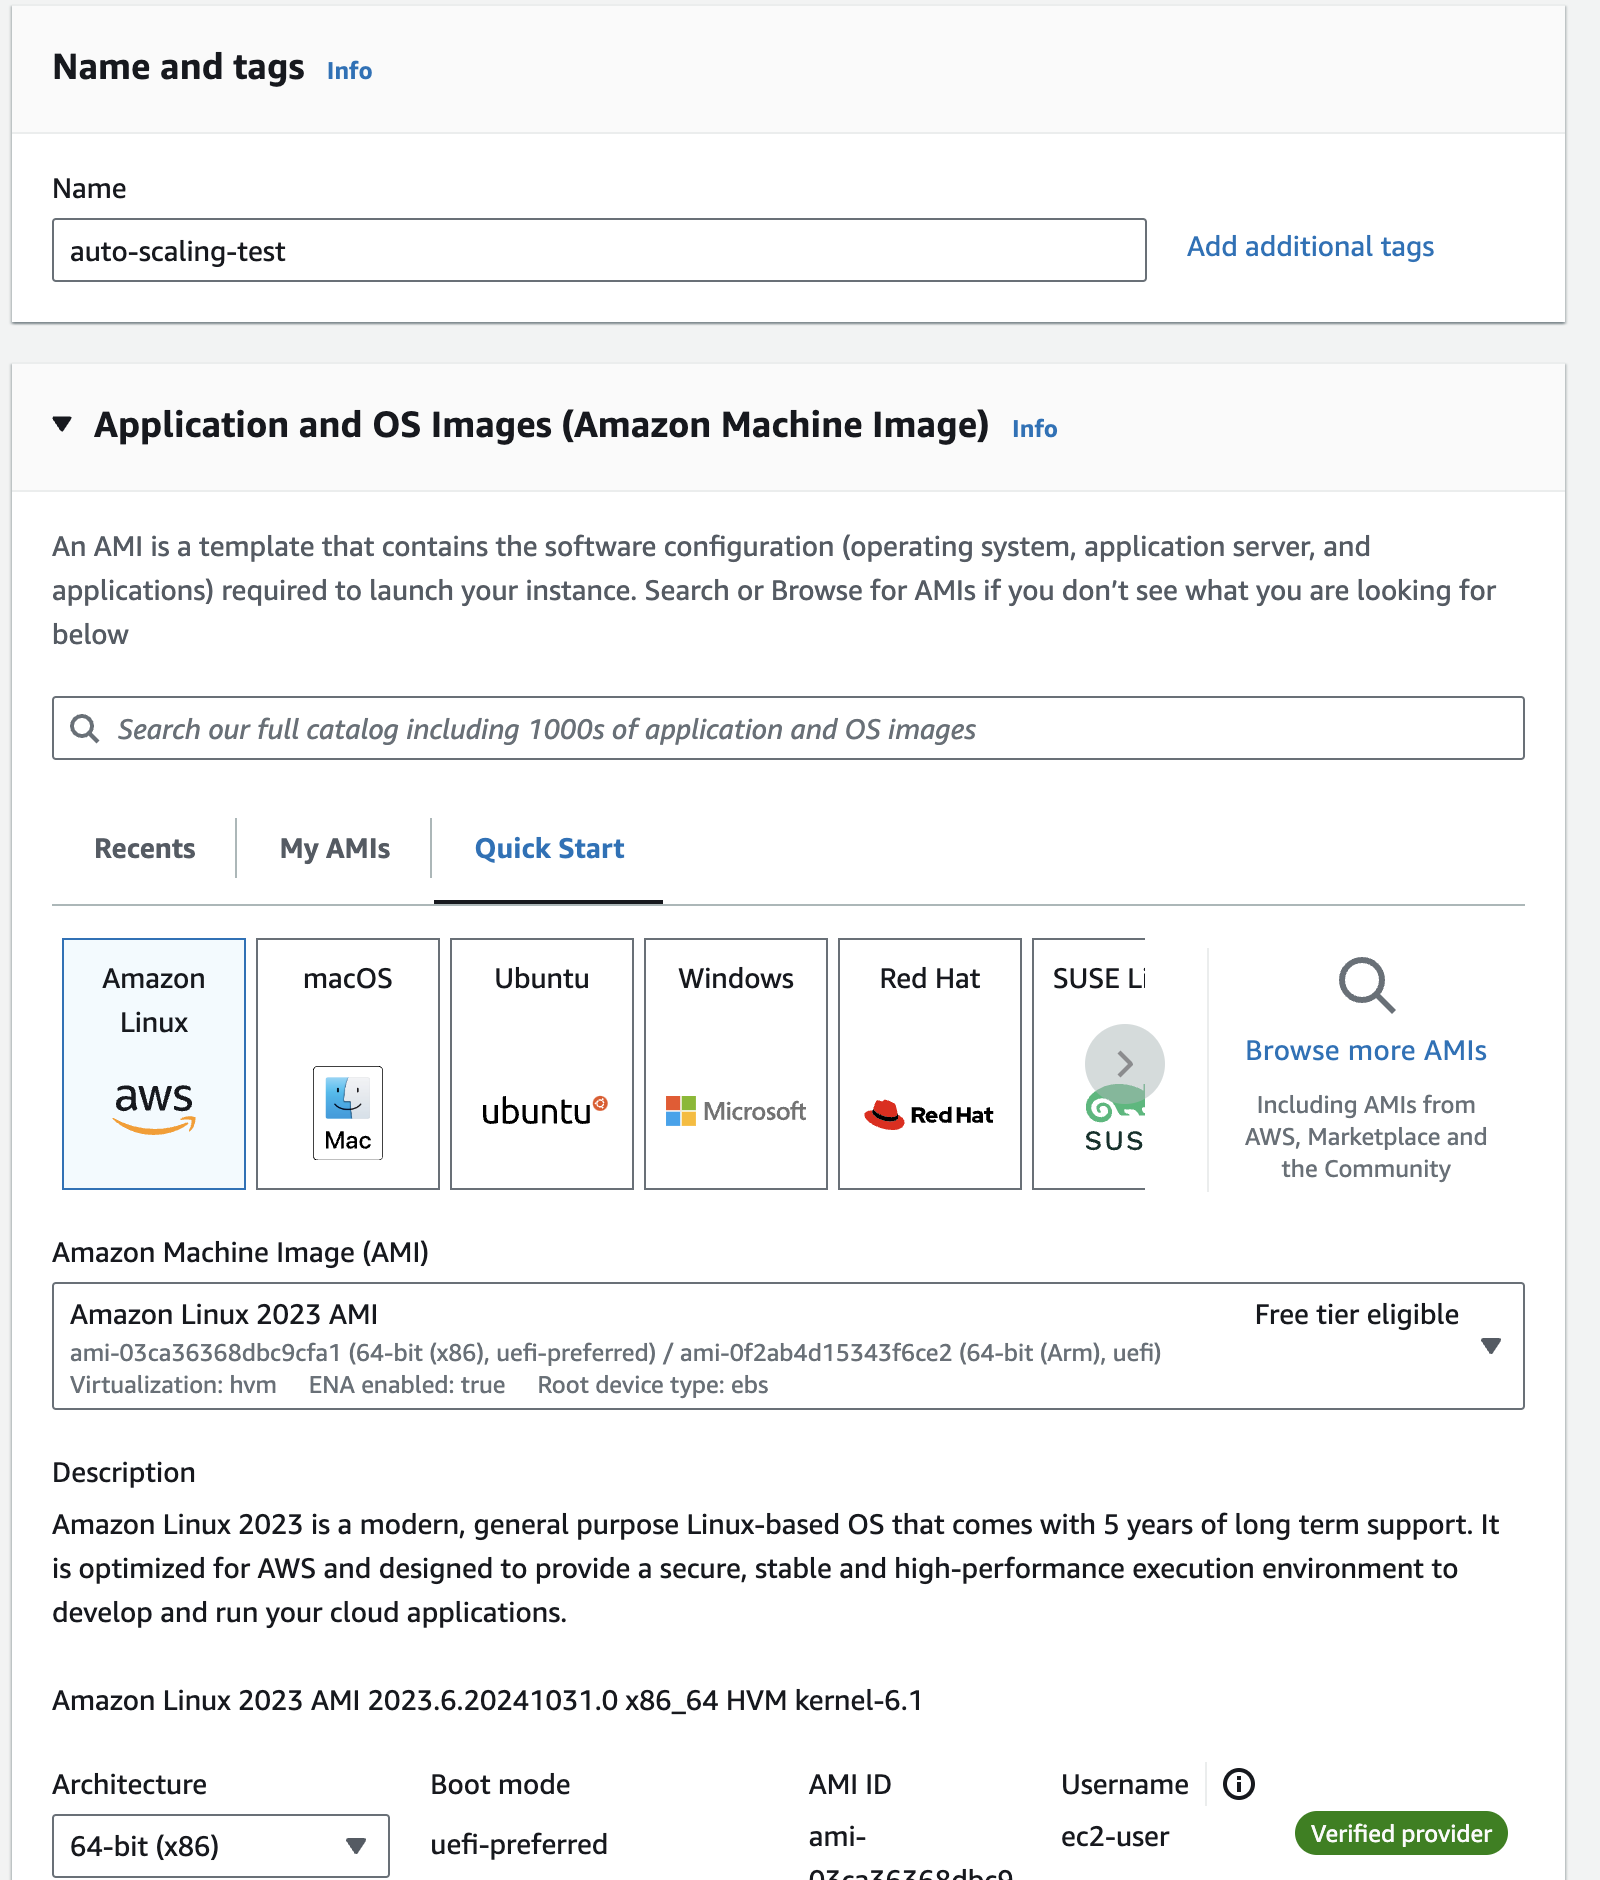
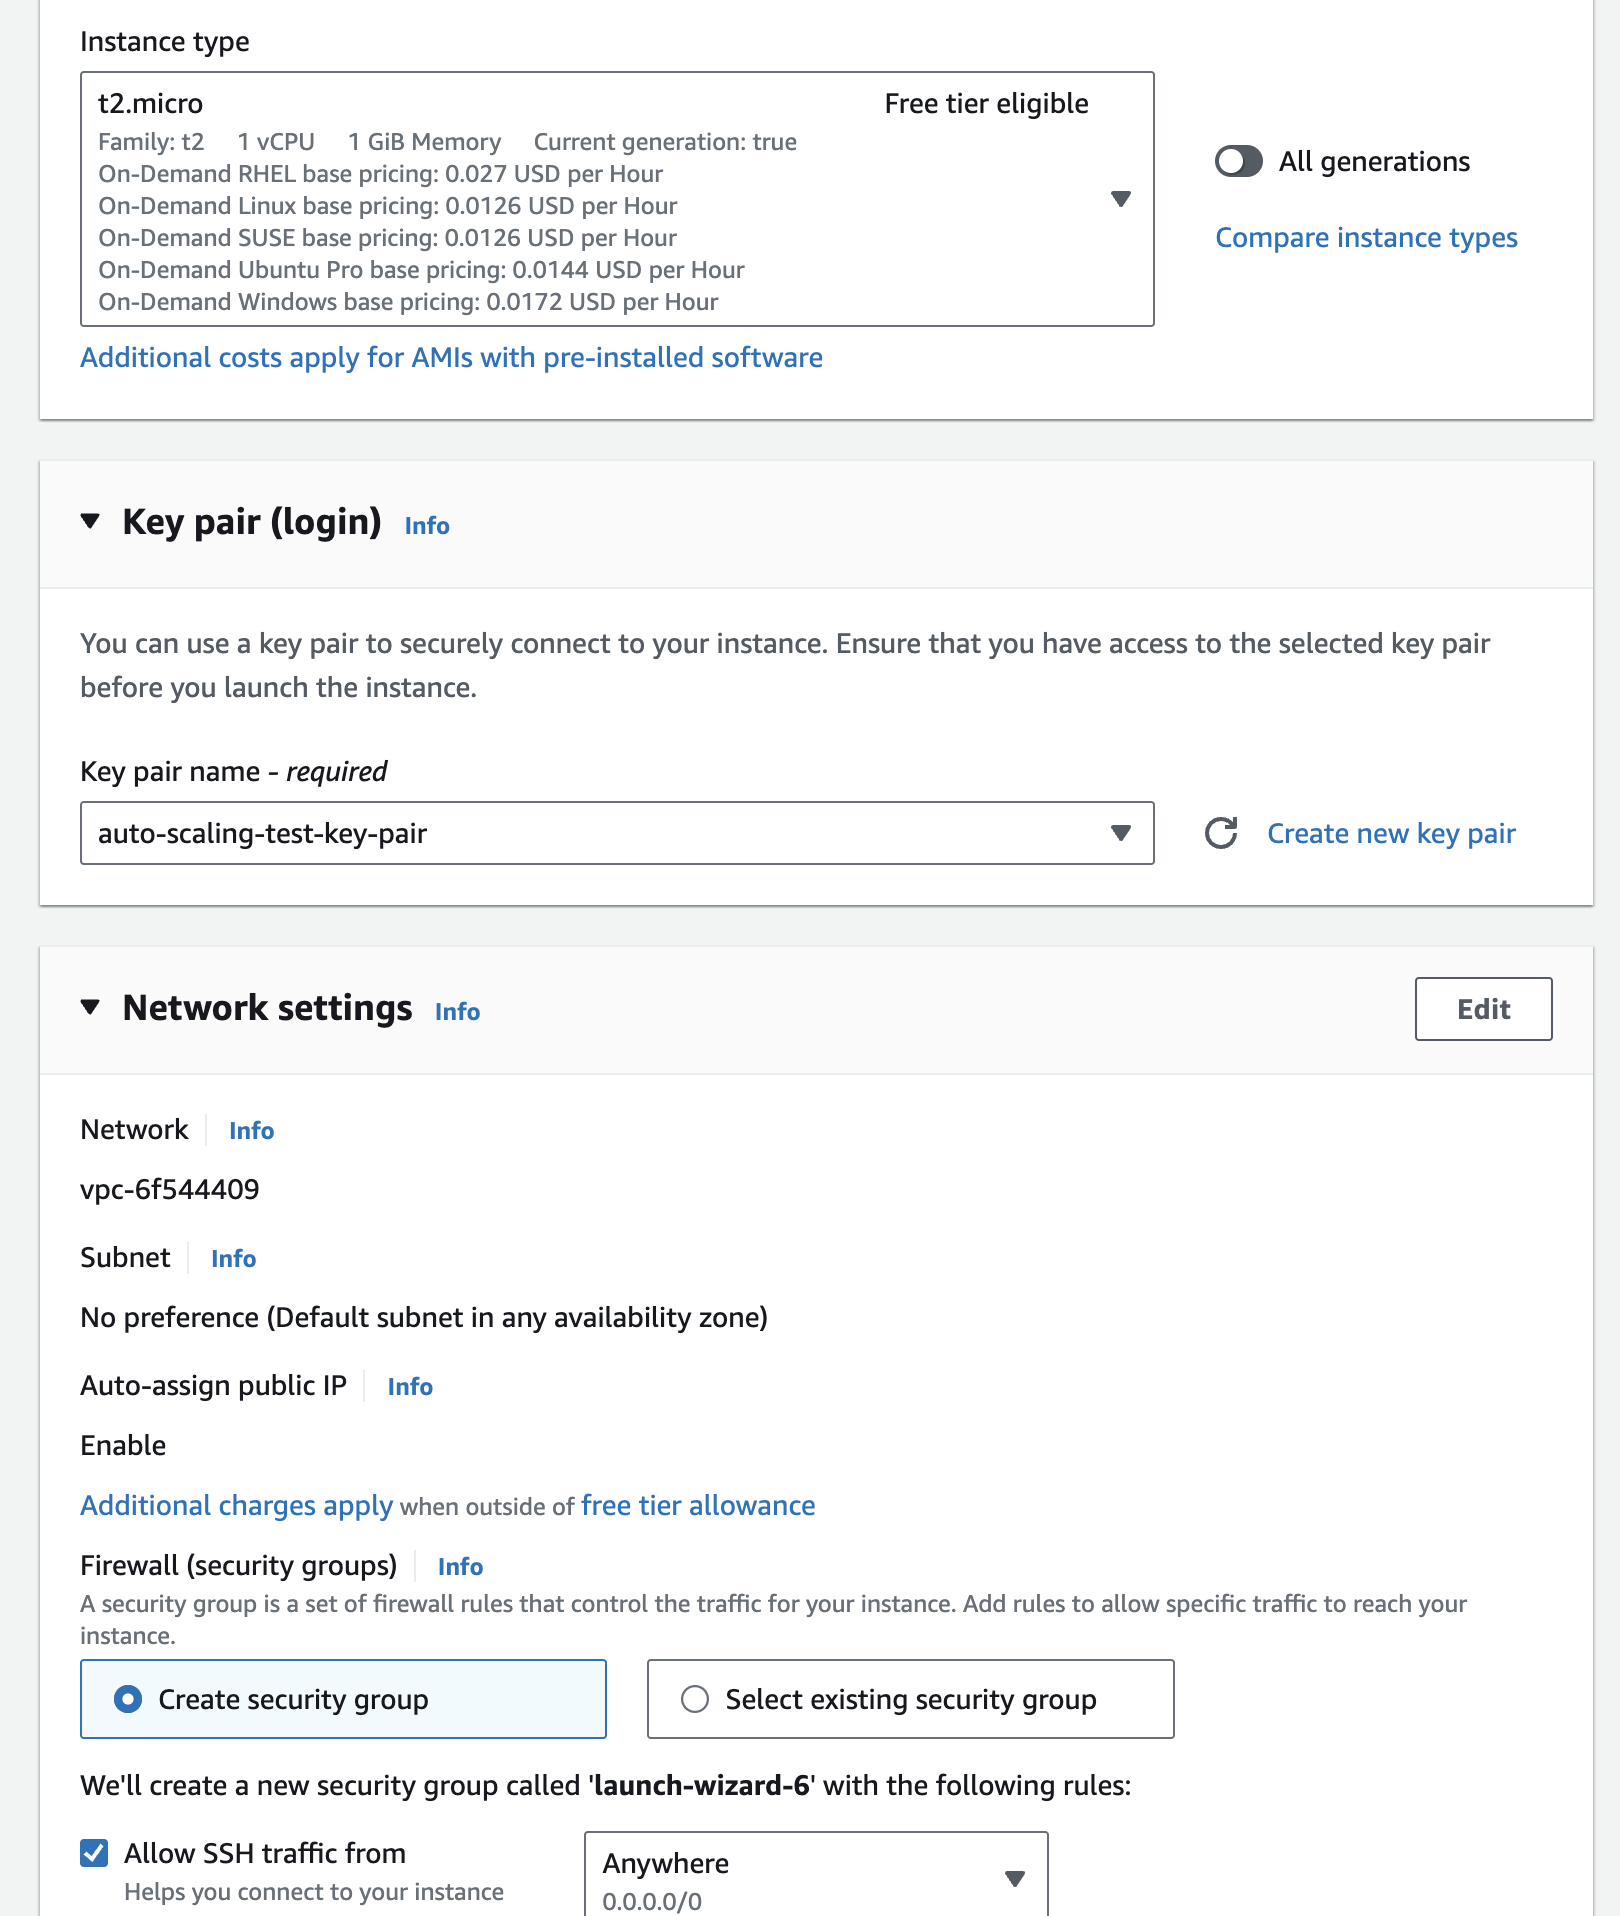
As a first step let us create and launch a ec2 instance. Below is the screen shot of all the configurations based on which ec2 instance was launched.
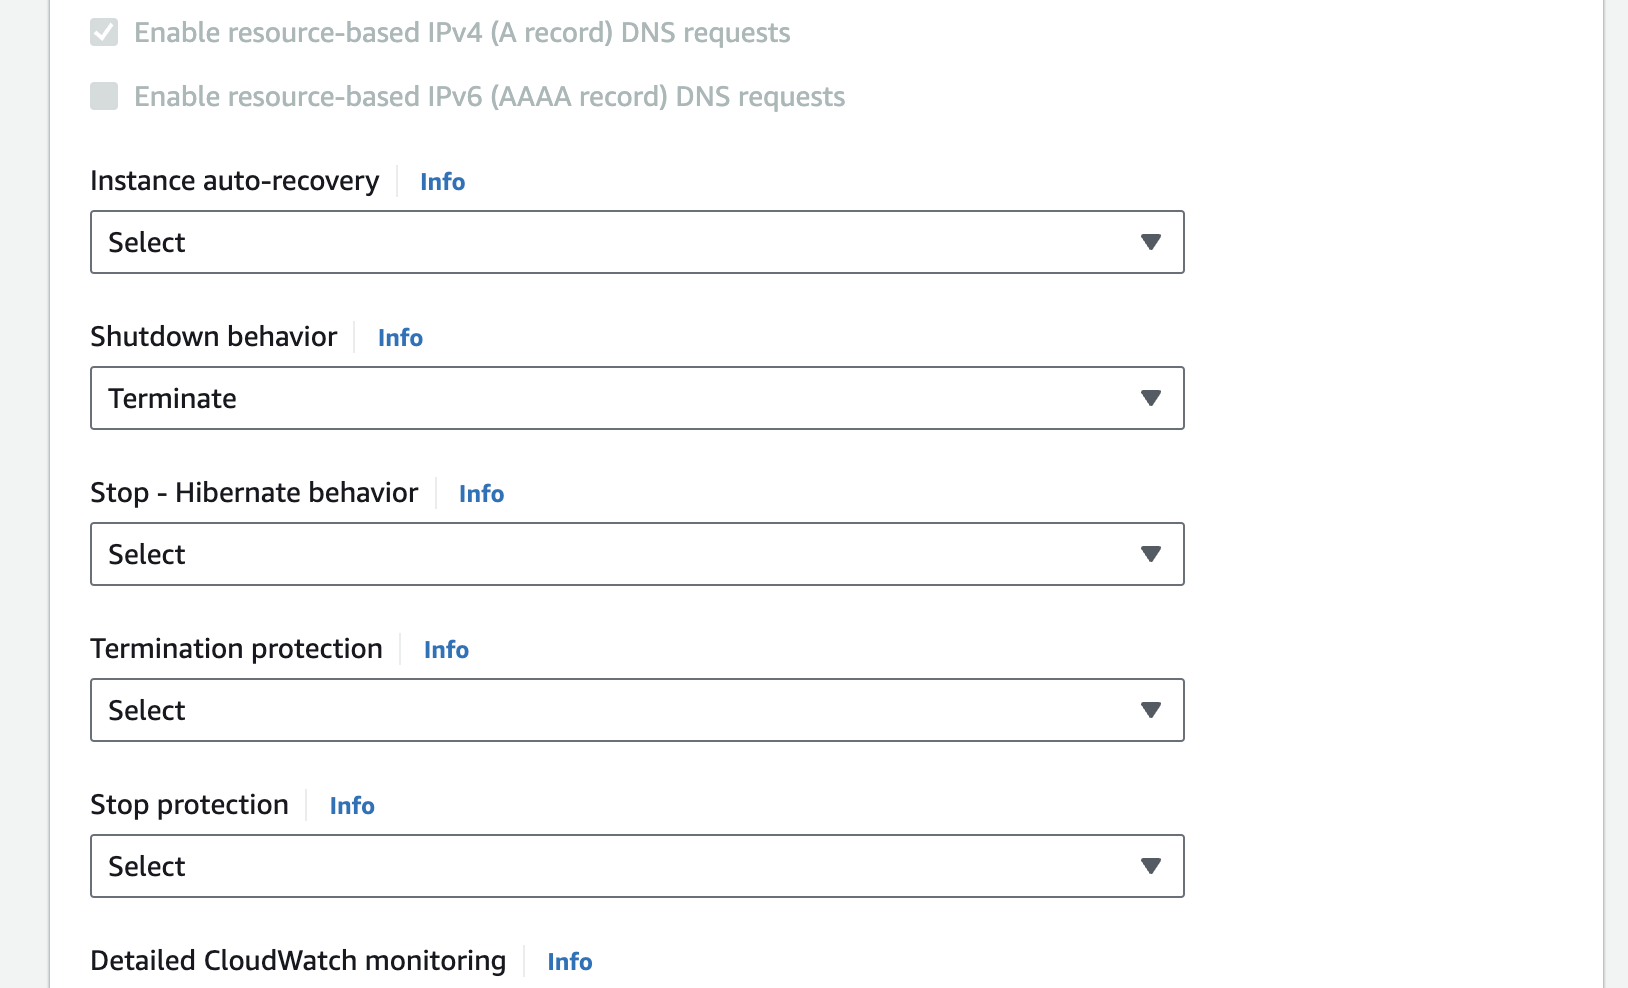
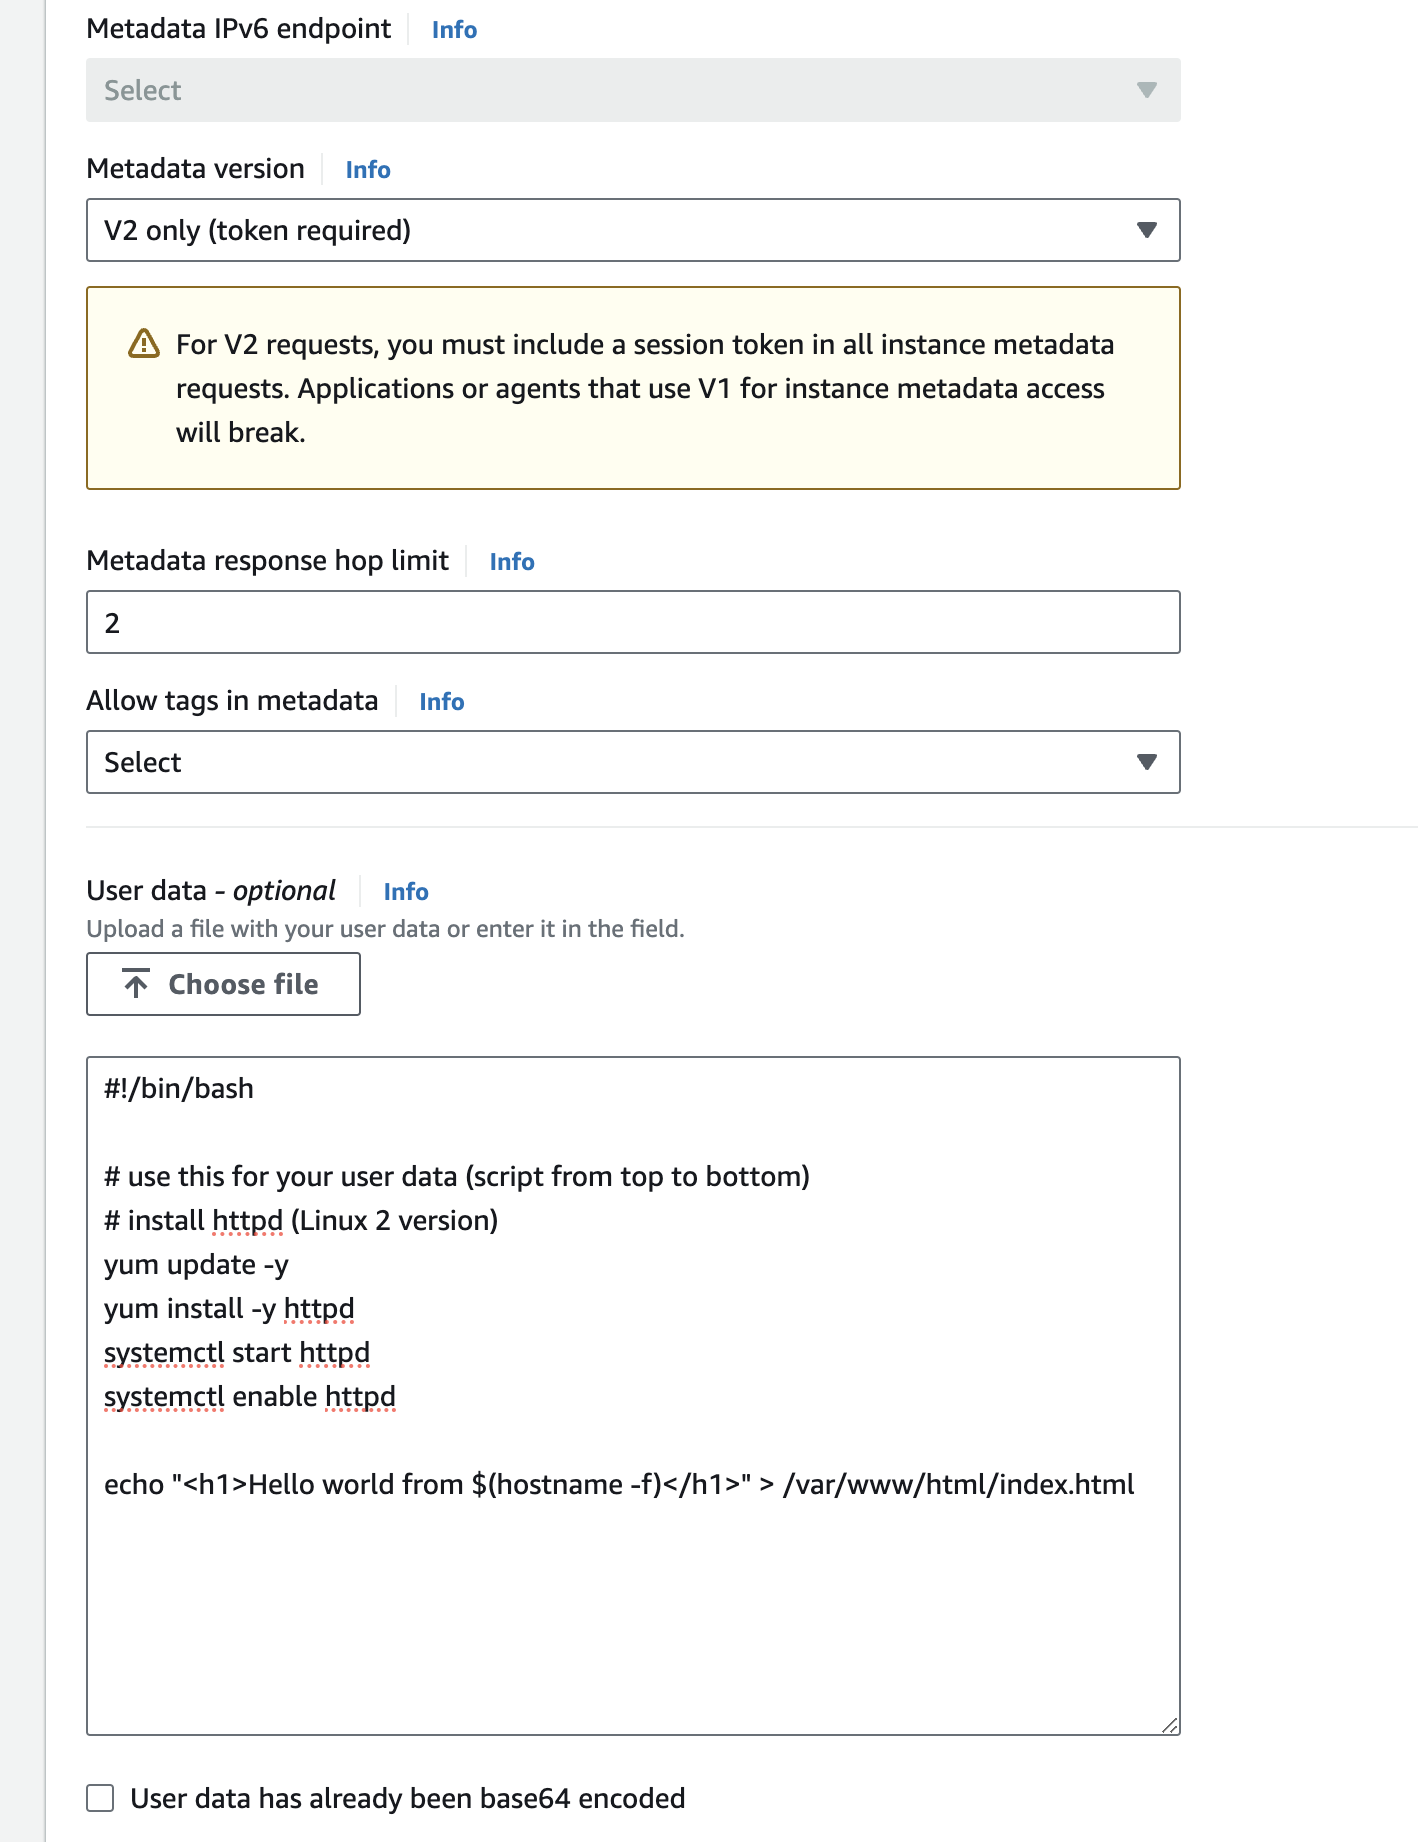
Here below screenshot is the configuration for advance options where we've changed 2 things
- Shutdown behavior to
terminate - Add a user script to setup server and index.html file to spinup during start up
#!/bin/bash

# use this for your user data (script from top to bottom)
# install httpd (Linux 2 version)
yum update -y
yum install -y httpd
systemctl start httpd
systemctl enable httpd

echo "<h1>Hello world from $(hostname -f)</h1>" > /var/www/html/index.html
Instance Type offered by AWS (opens in a new tab) Instances Vantage (opens in a new tab)
Security Groups
Think of security group as a firewall between users from internet and your server. They regulate acess to ports and authorize or forbit IP ranges. They also control the network inbound (from other to the instance) and outbound (from instance to other)

Now in order to allow network request edit your security group's inbound rule. The default setting should only be allowing ssh request port 22.

Now you should be able to access your server via the public ip or public ipv4 DNS.

Above is the security group's inbound rule created for a orthanc server. This will accept ssh access and a http request to port 8043 (this is the port on which nginx is listening to and is making a reverse proxy to orthanc server's port 8042)
Private & Public IP (IPV4)
Network have two sorts of IP i.e. IPv4 and IPv5. IPv4 is most commonly used format online. IPv6 is newer and solves problems for the Internet of Thing (IoT). For each number in IPv4 we have the possibility 0-255 numbers.
i.e [0-255].[0-255].[0-255].[0-255] that would be 3.7 different addresses in public space.
Public
- Public IP means the machine can be identified on the internet (WWW)
- Must be unique accorss the whole web (not two machines can have the same public IP)
- Can be geo located easily.
Private
- Private IP means the machine can only be identified on private network only.
- IP should be unique accross only the private network. However 2 different private network can have common/same ips.
- In order to connect to WWW using an internet gateway (a proxy).
- Only specified range of IP can be used as private IP.
Amazon Machine Image (AMI)
An Amazon Machine Image (AMI) is a master image for the creation of virtual servers -- known as EC2 instances -- in the Amazon Web Services (AWS) environment.
AWS comes with base images such as Ubuntu, Fedora, RedHat, Windows etc. What if you want to create your own image? That's an AMI - an image to use to create our instances. AMI can be build for windows and linux machine.
You want to use custom build AMI provide many advanges.
- Pre-installed packages
- Faster boot time (no need for ec2 user data at boot time)
- Machine comes configured with monitoring / enterprise software.
- Installing your application ahead of time (for faster deploys when auto scaling)
- You can use someone else's AMI that is optimized for running an app, DB etc.
In order to create a AMI select the ec2 instance and click the Actions > Image and templates > Create image.
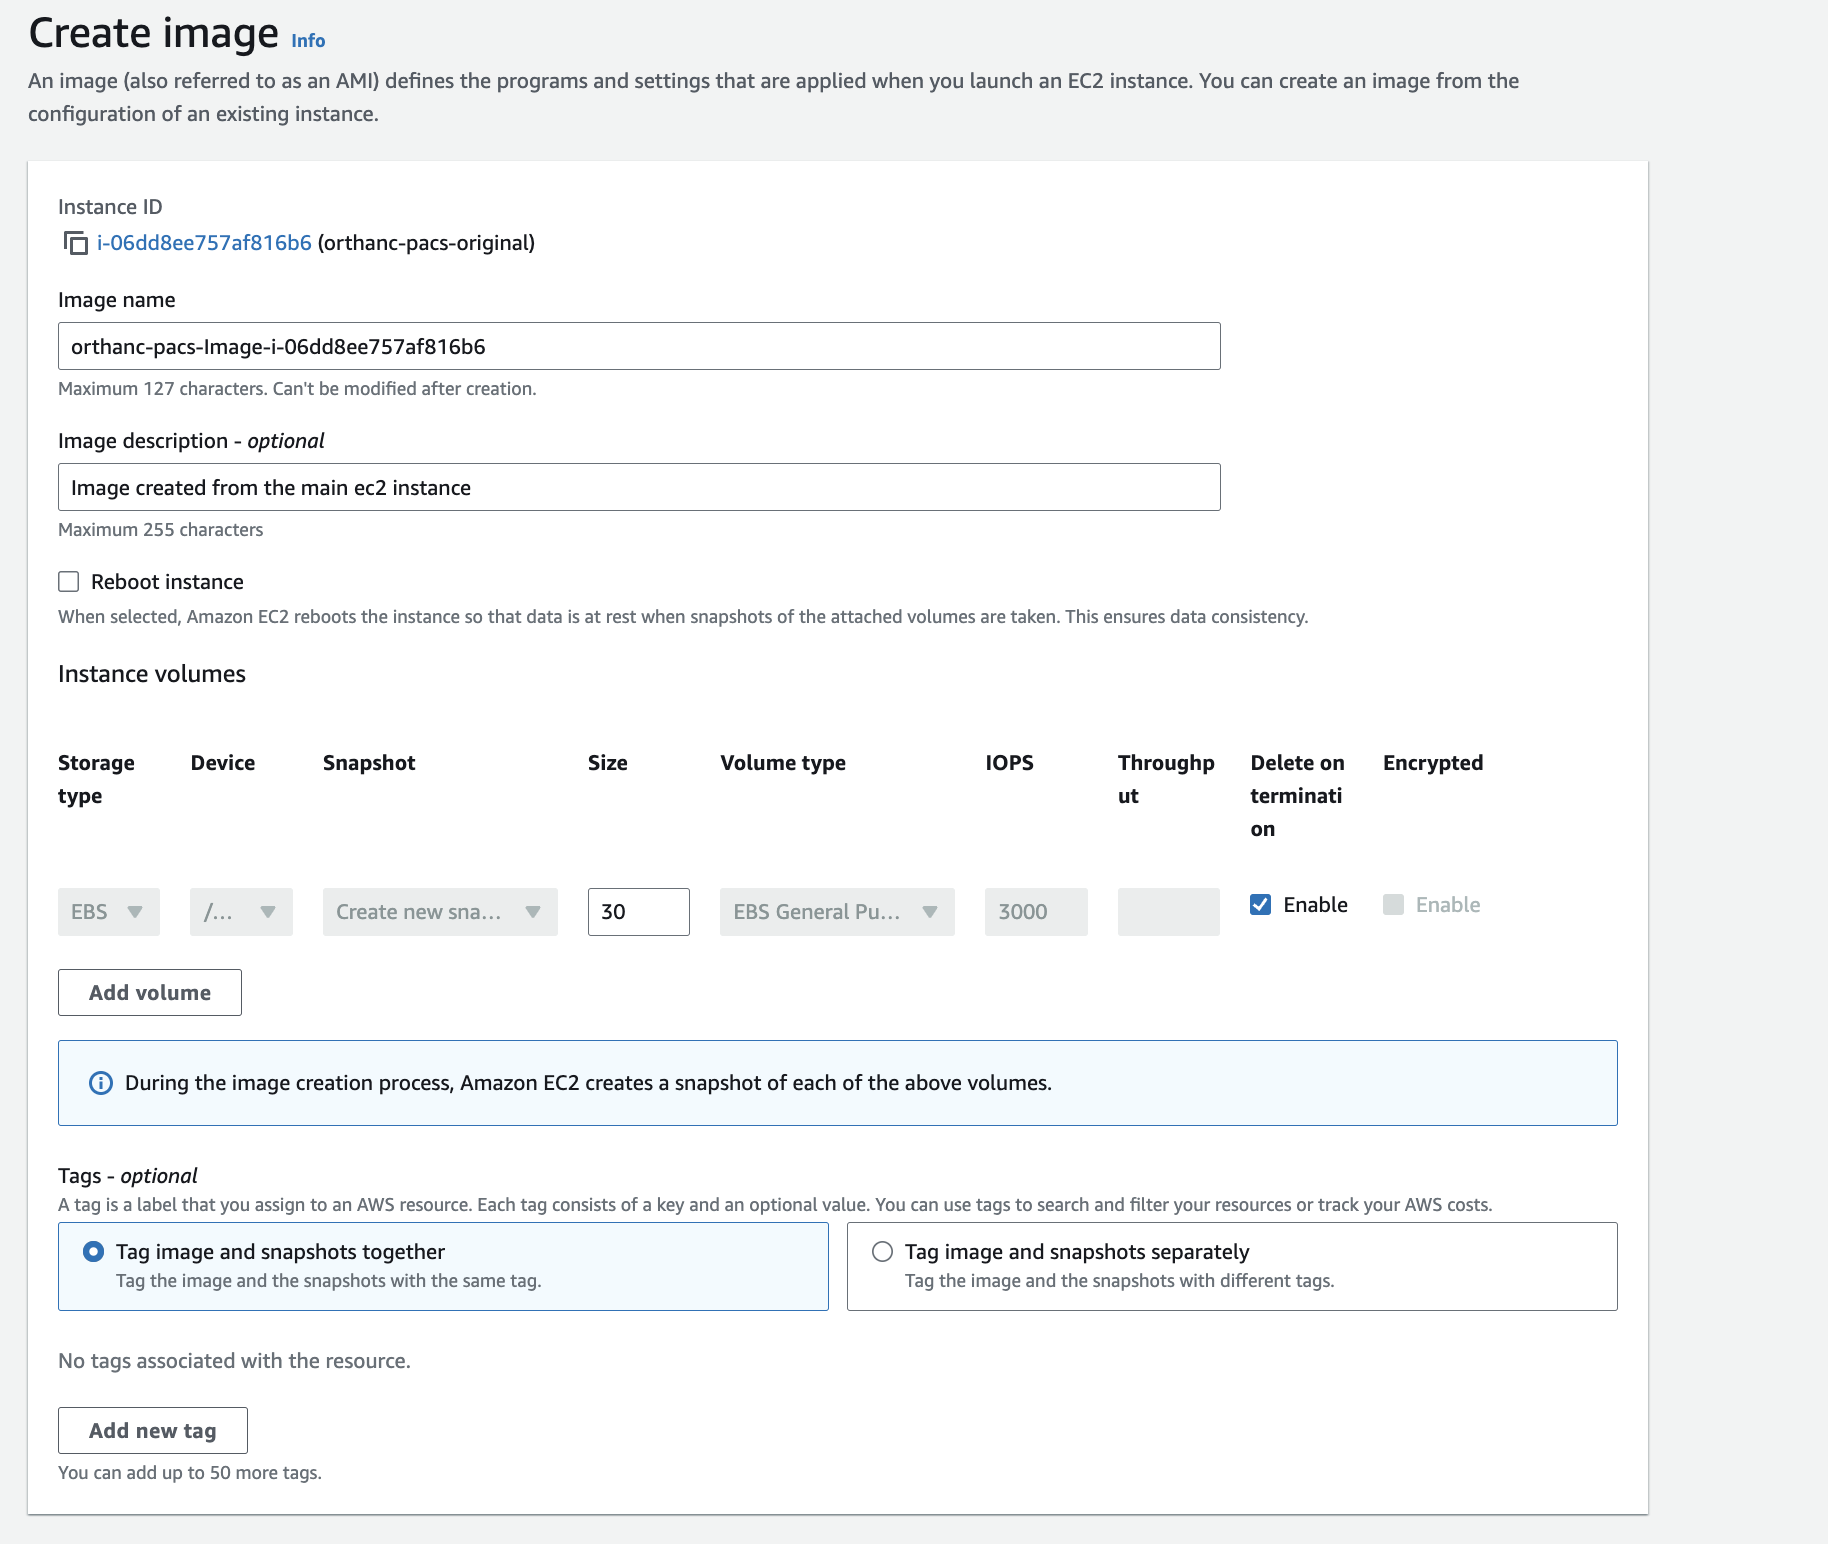
Now in order to launch a new instance out of this AMI go to EC2 > AMI (Images) > Open the image > Click Launch instance from AMI.
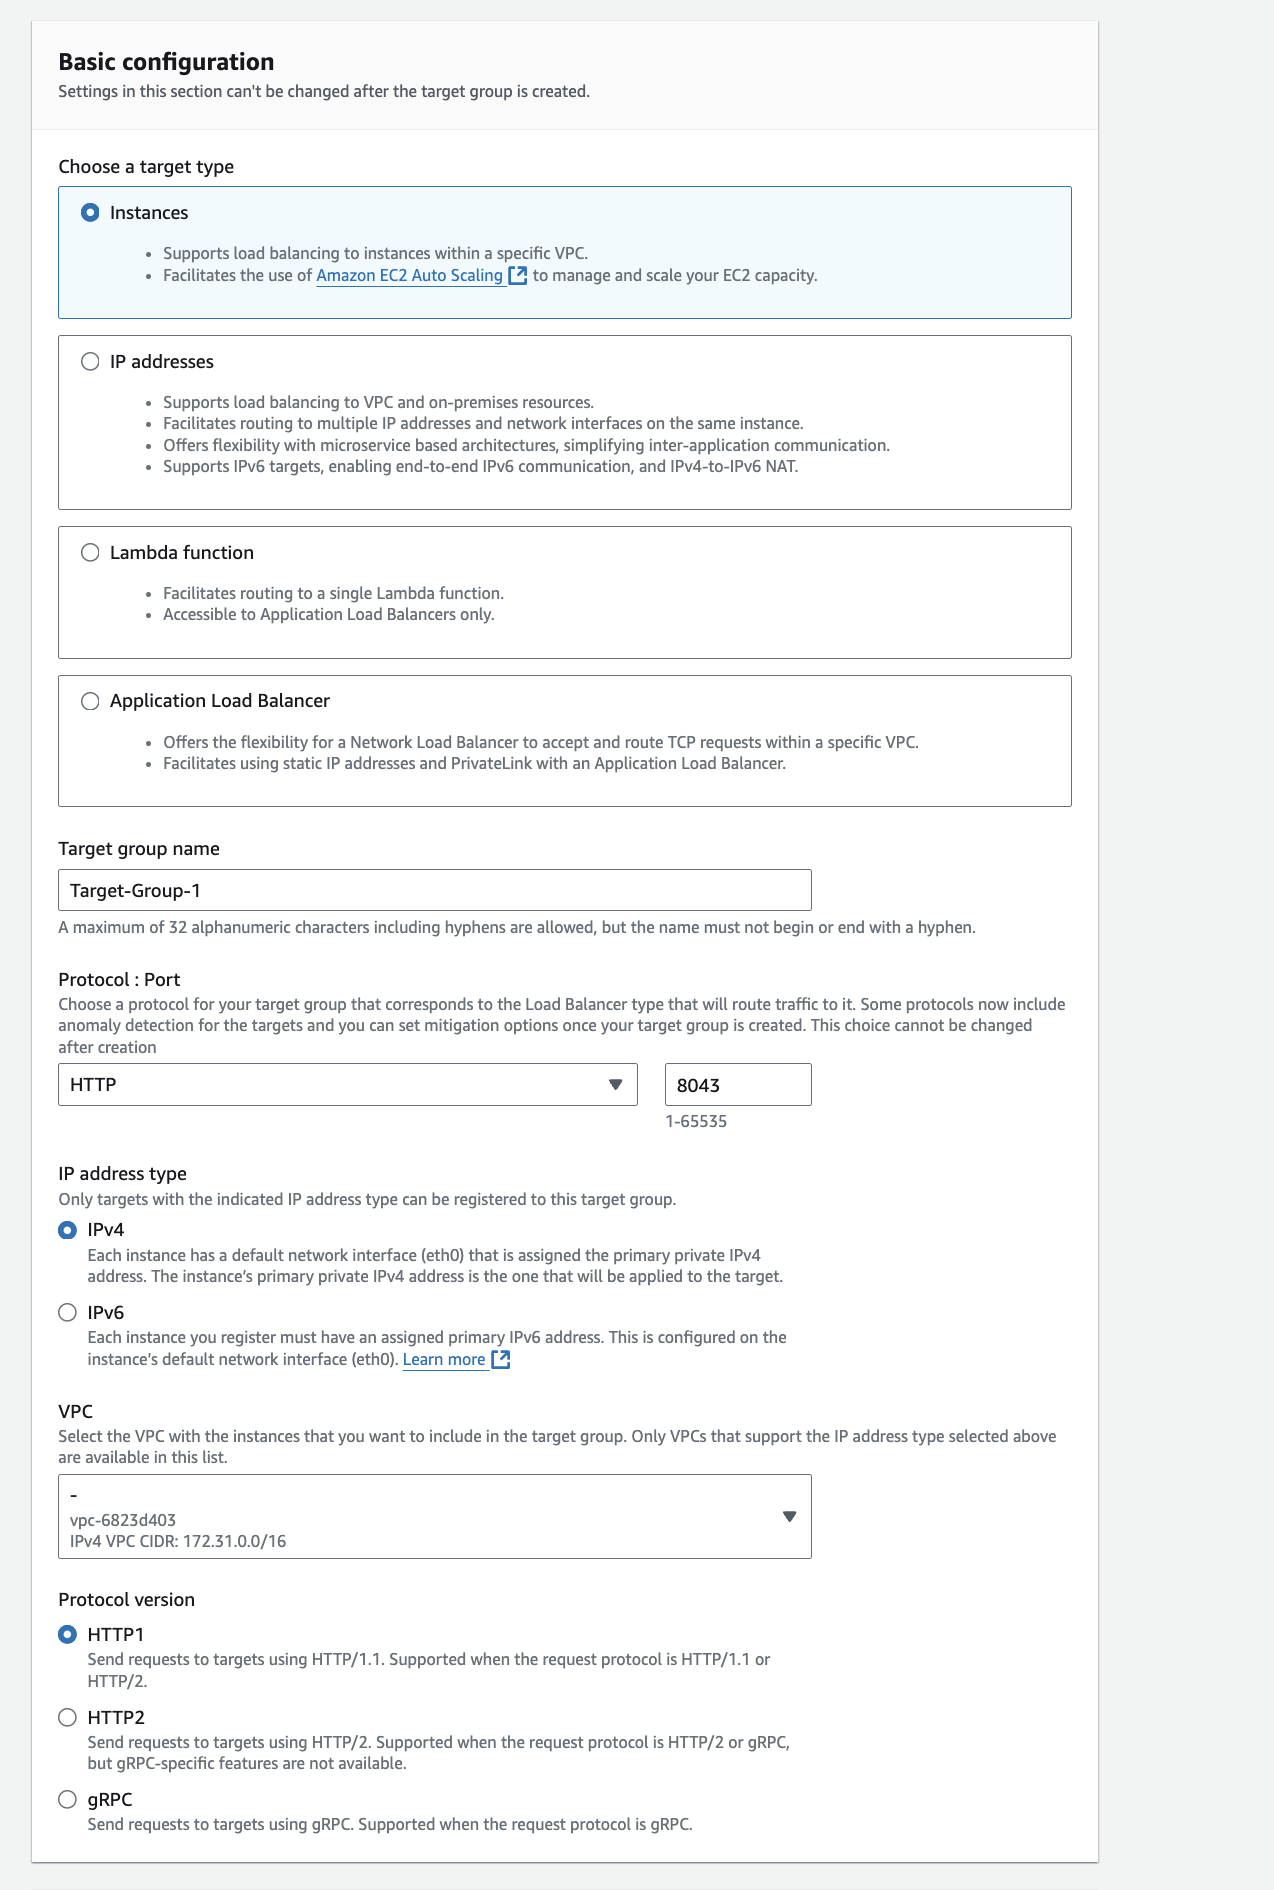
Setup you target group
Here in the below screenshot I'm setting up a taget group that would request a ec2 instance which is running a orthanc PAC server on port 8042. However in order to by pass the CORs I have setup a nginx server on top of it which will reverse proxy to port 8042 orthanc server. Therefore this target group will trigger the instance with port 8043.
Load Balancer (ALB)
The Load Balancer when setup will provide you a DNS A record using this you can make request to the linked instances via target group. The load balancer will distribute the traffic according to the selected LB algorithm.
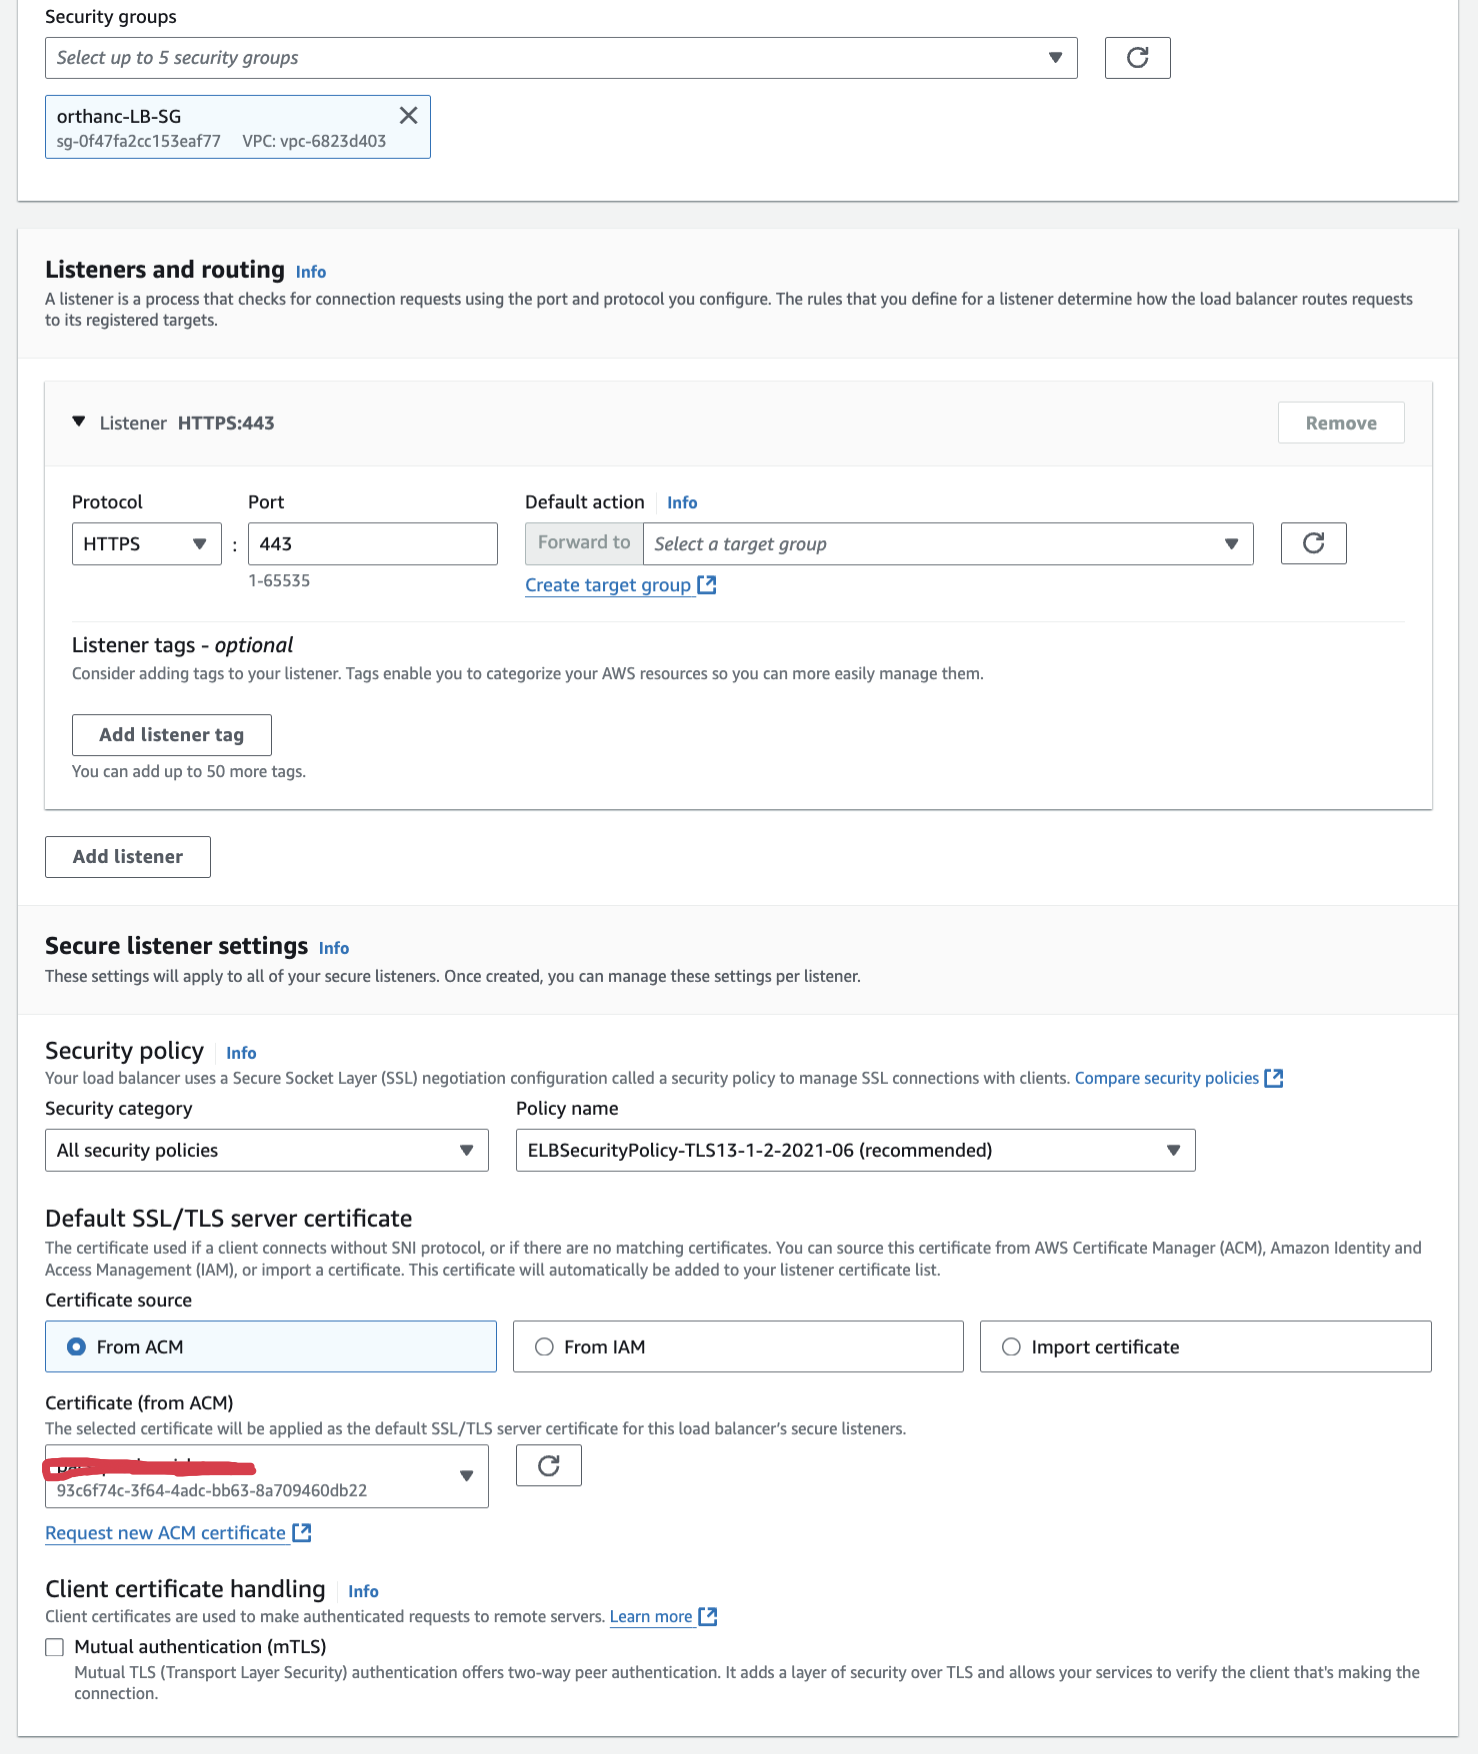
In order to create a load balancer first you need to register a target group. Here below we will trying setting up a Load balancer for a orthanc PAC server.
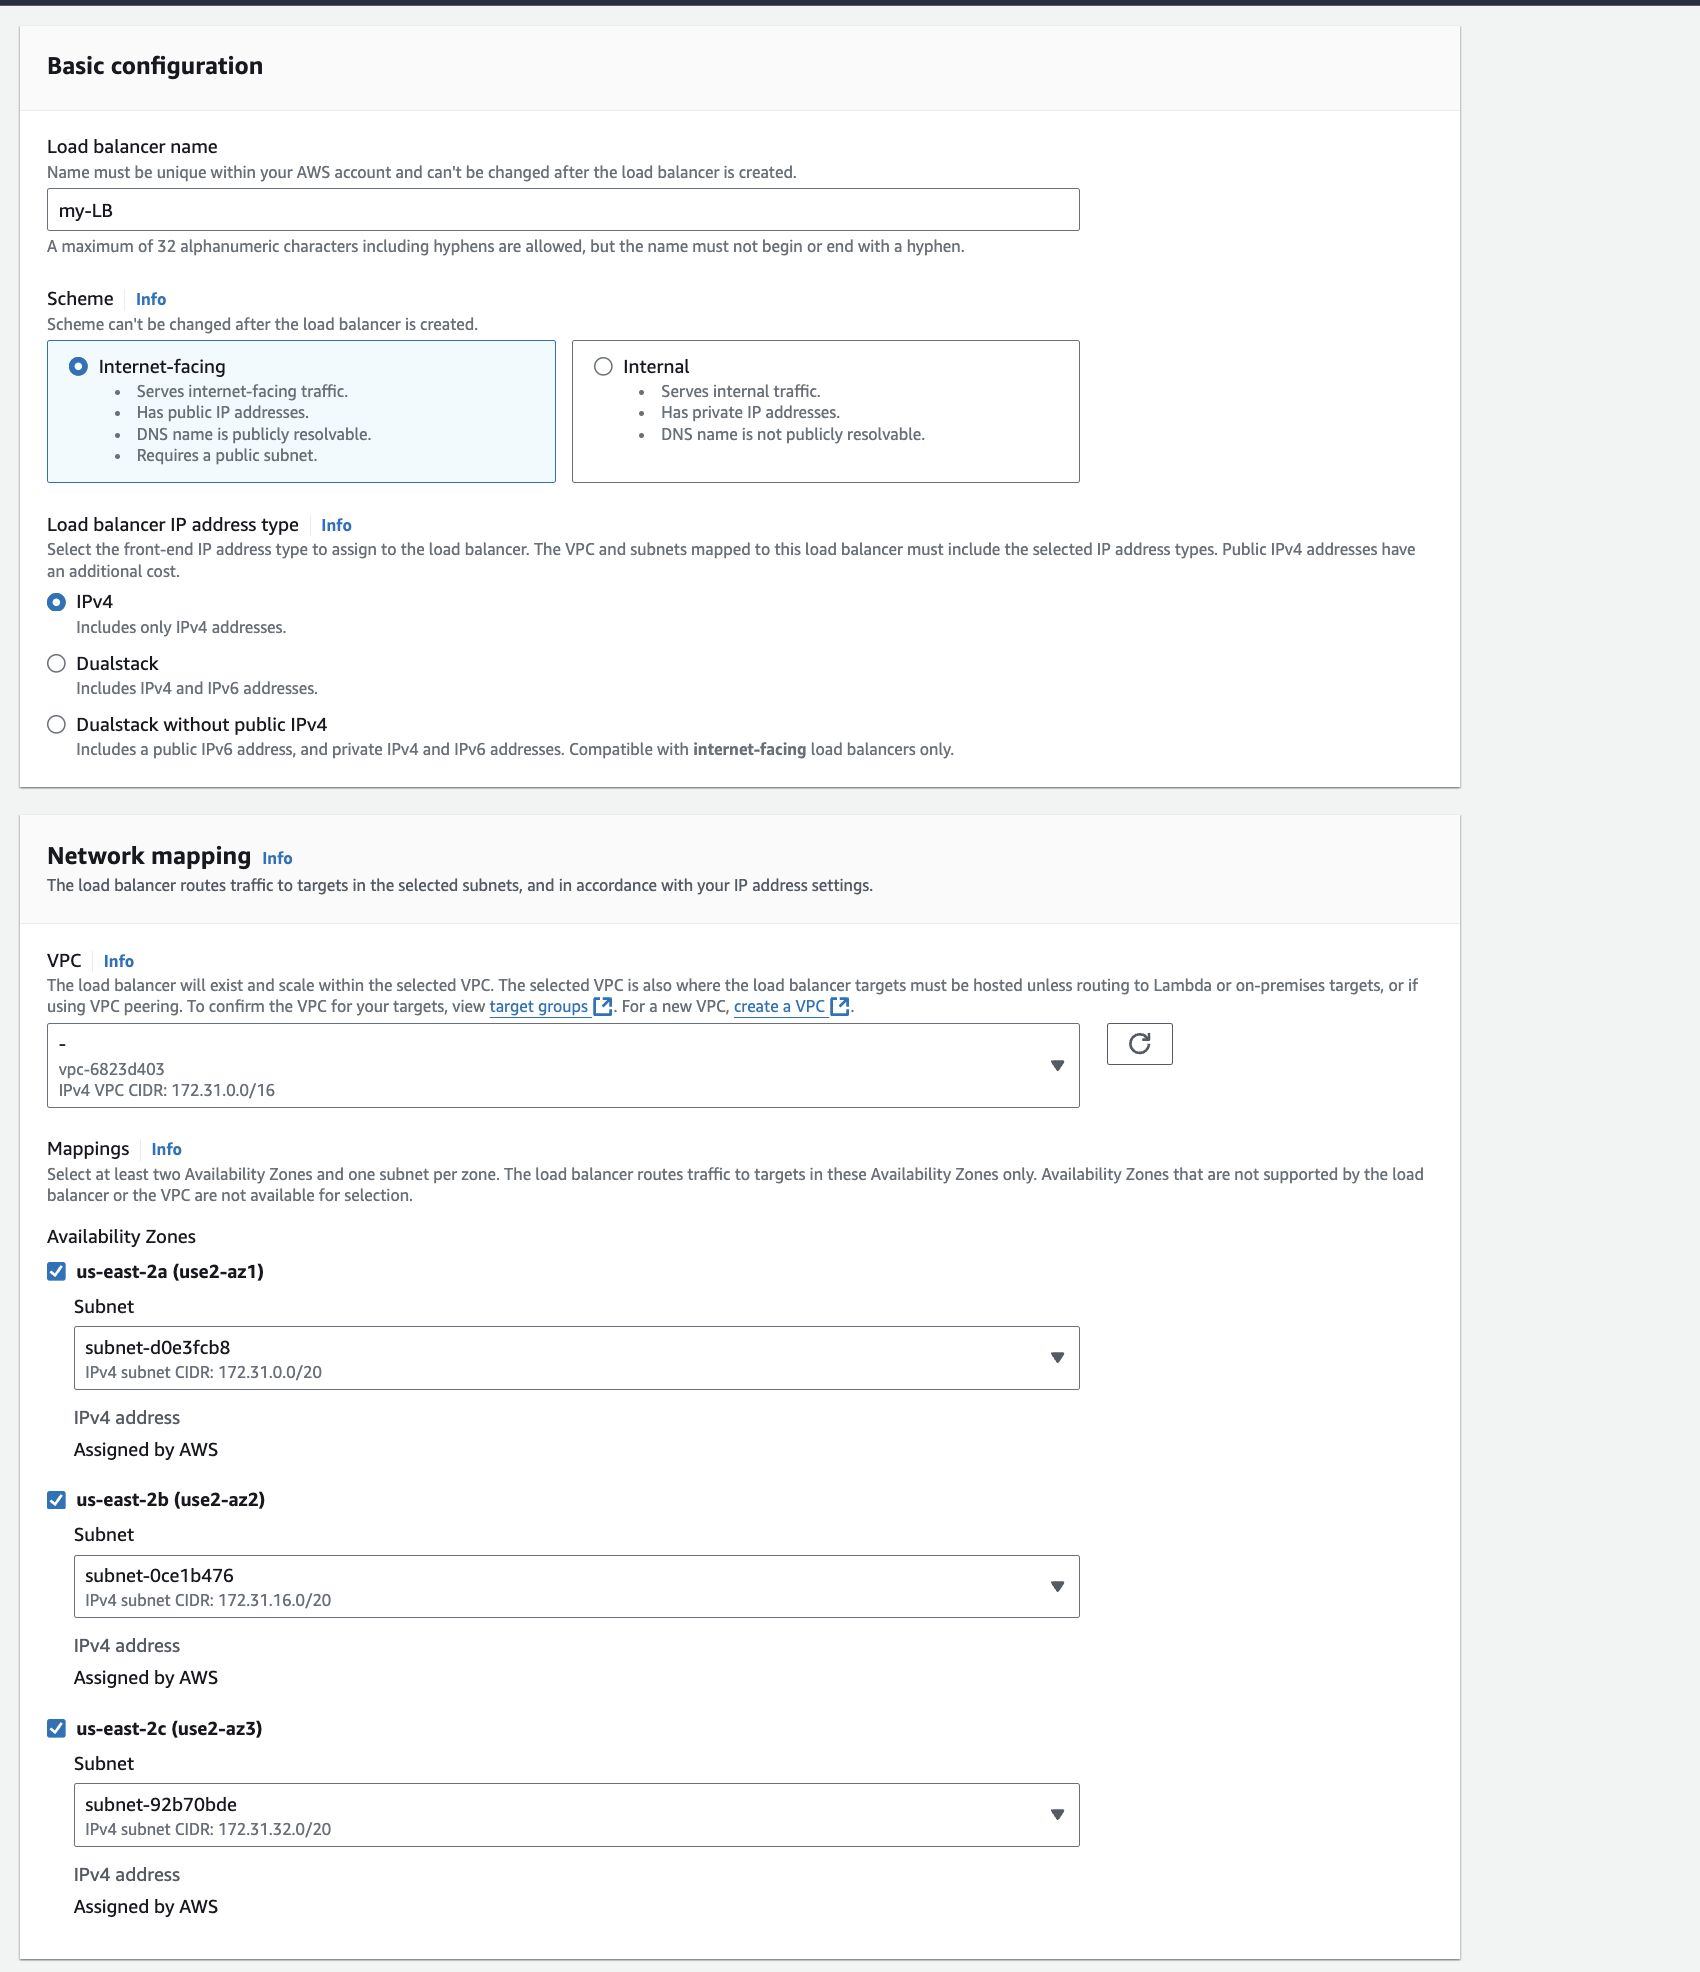
In the below screenshot
- select the security group that you have created for your PAC
- In the listener section select your security group and how you would like to make request using the load balancer's DNS (http or https)
- Select the certificate from listener settings from ACM if you have created one or else leave it blank.
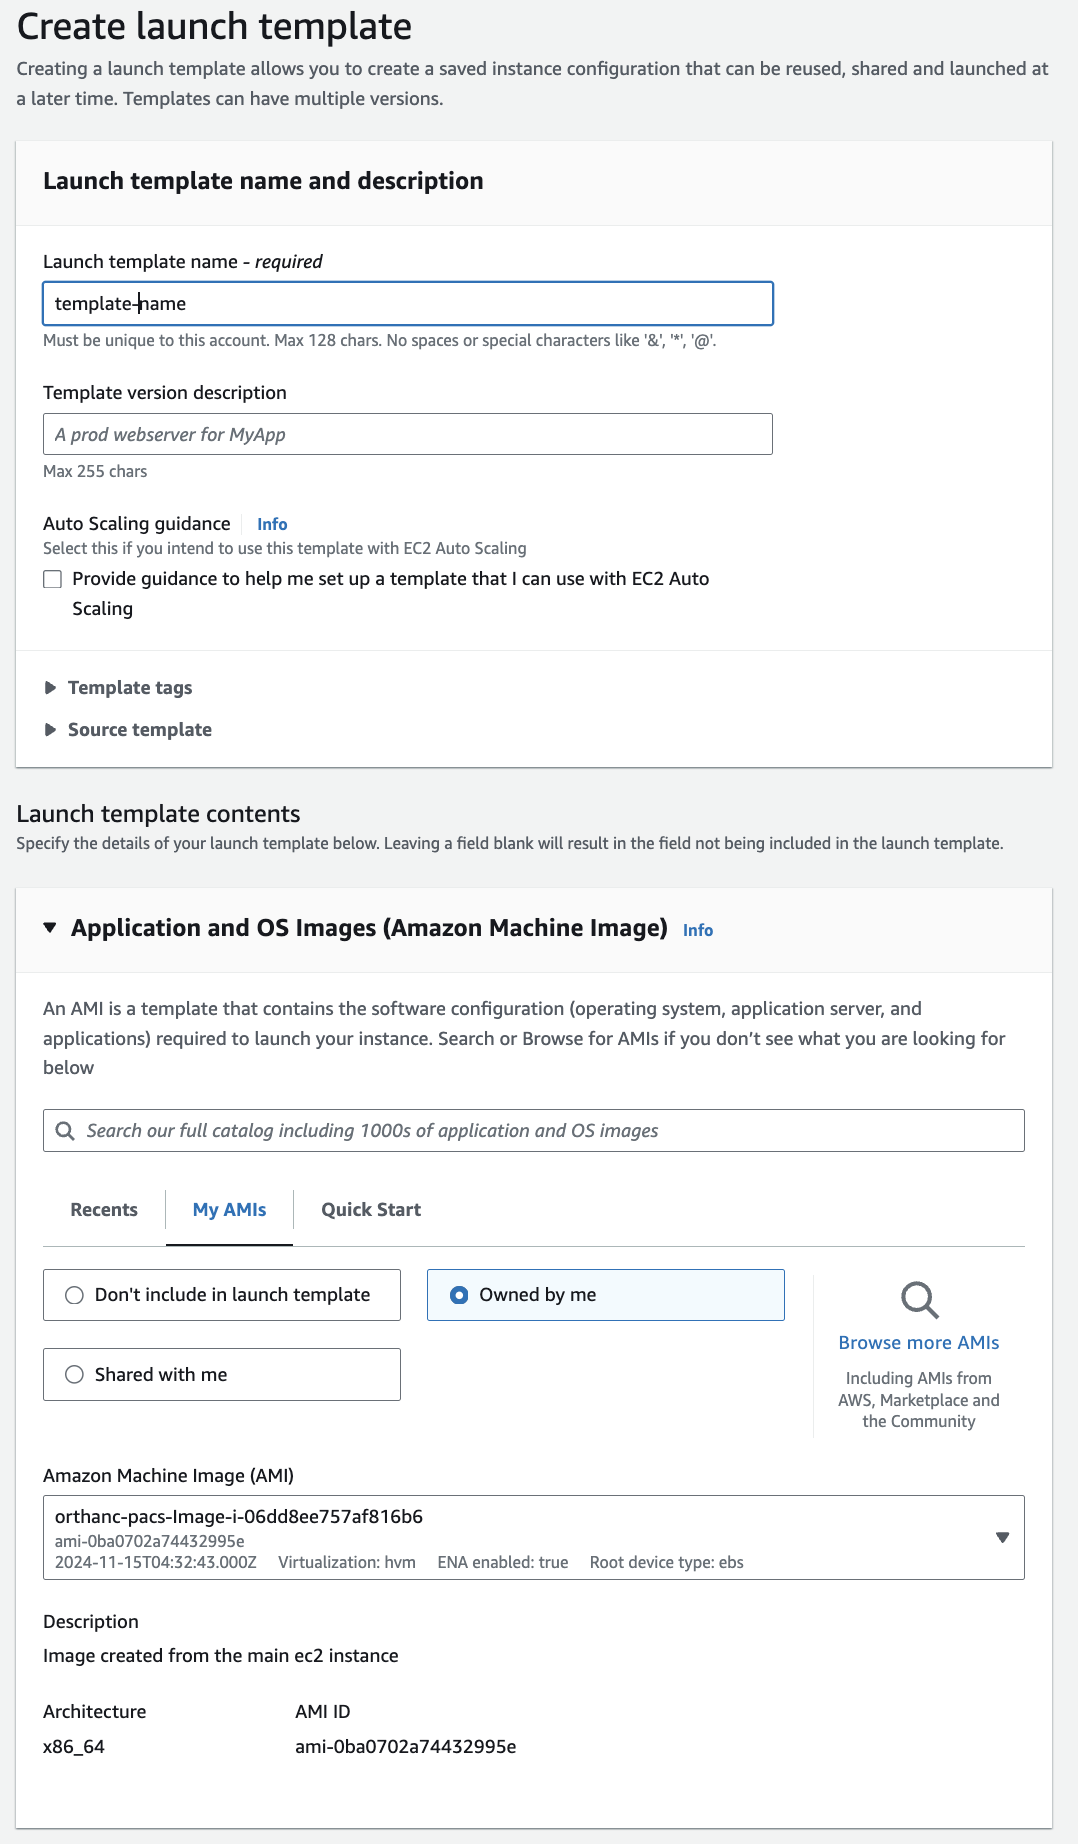
Launch Template
This is the final step before you create a Auto Scaling Group.


Auto Scaling Group
Now that you have every Target Group, AMI, Security Group, Load Balancer, Launch Template ready, we can finally create our auto scaling group.
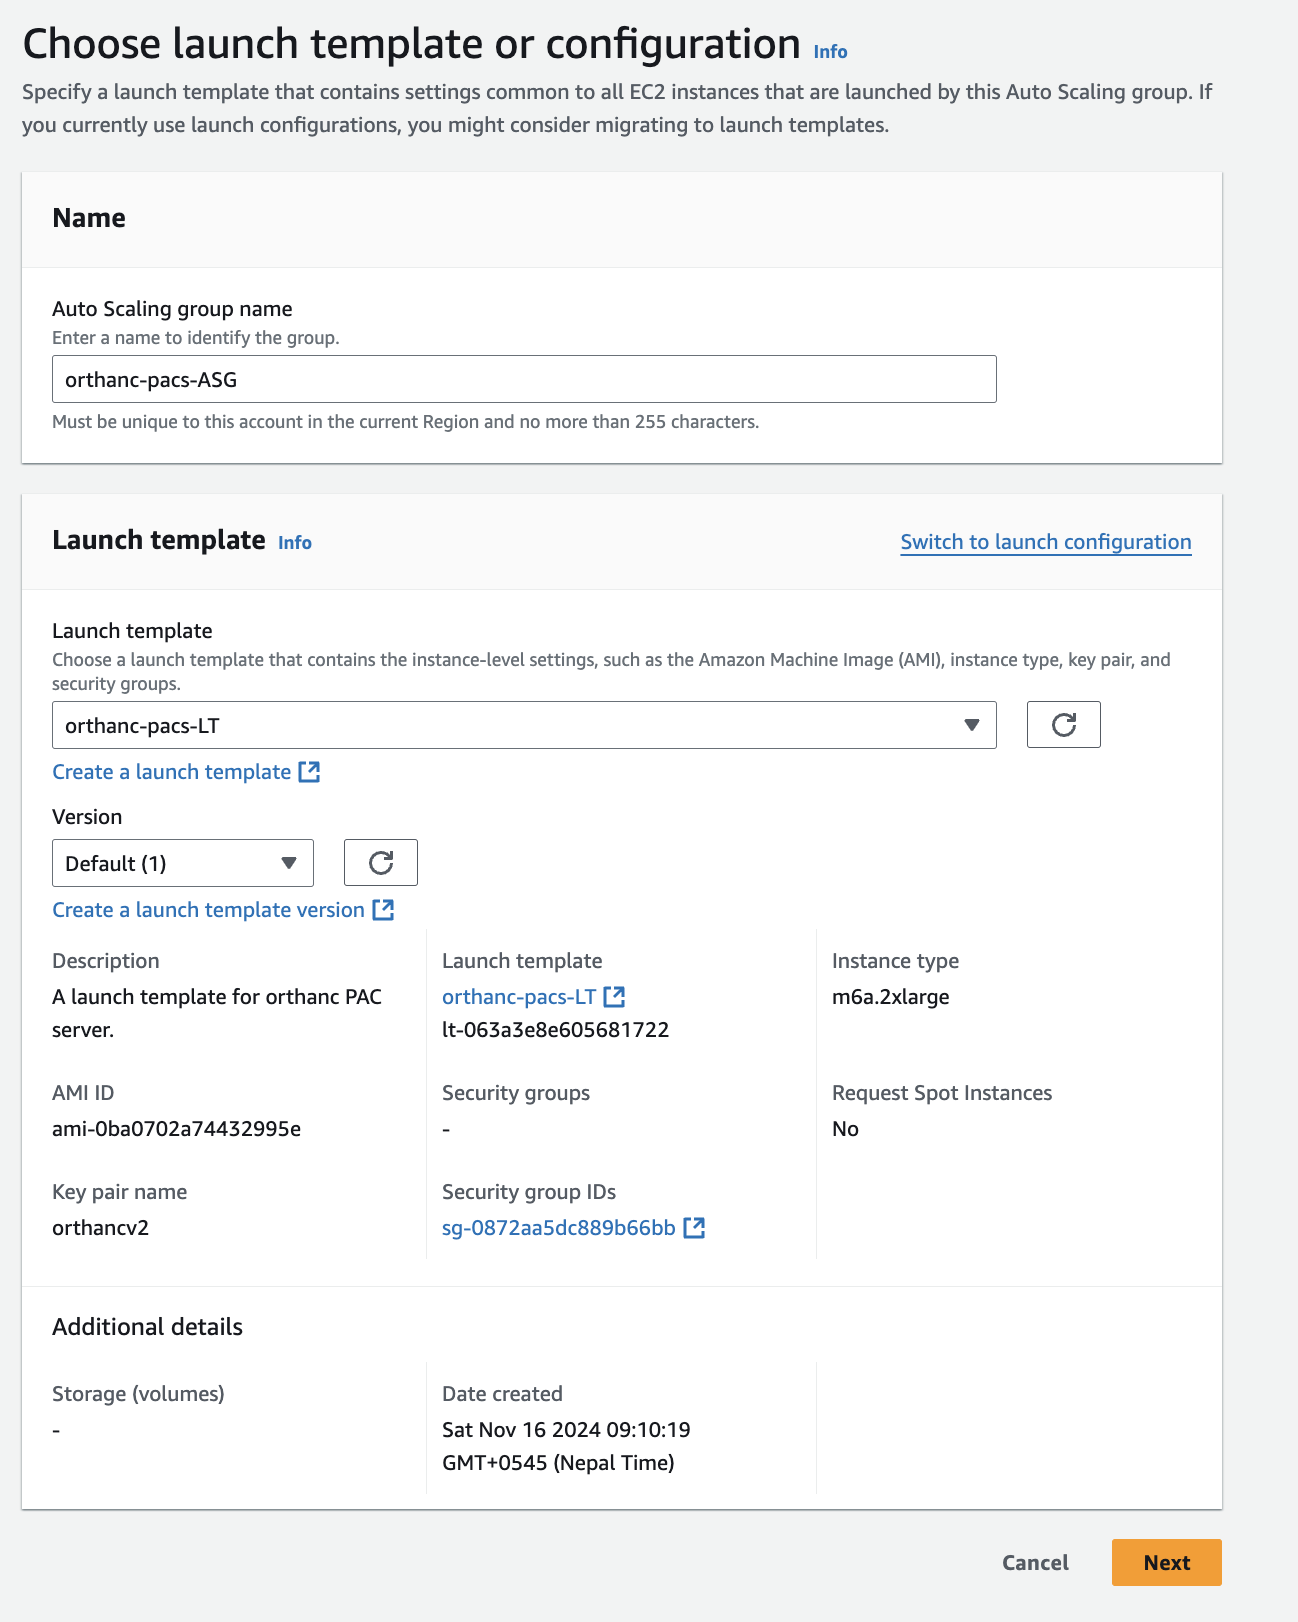
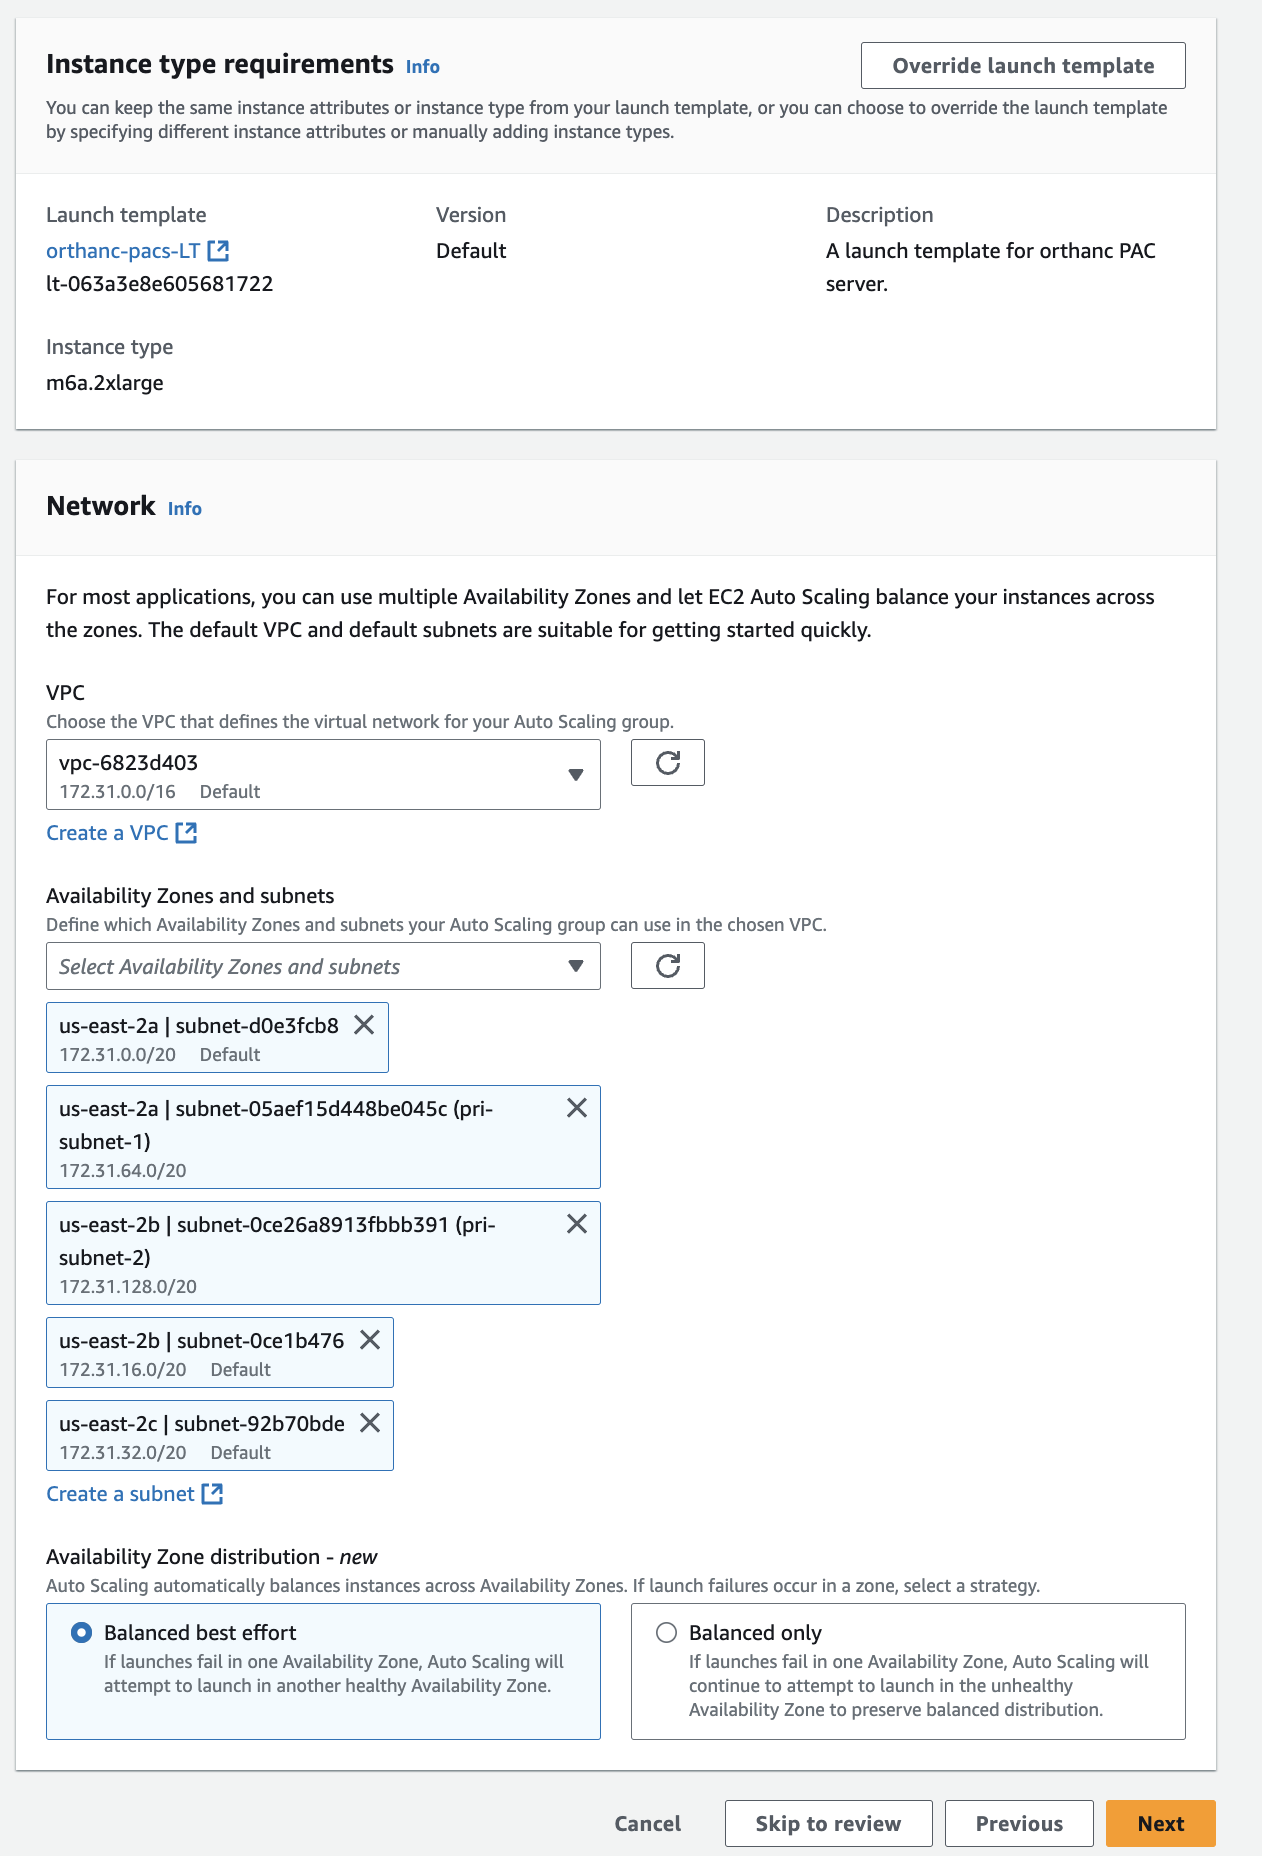
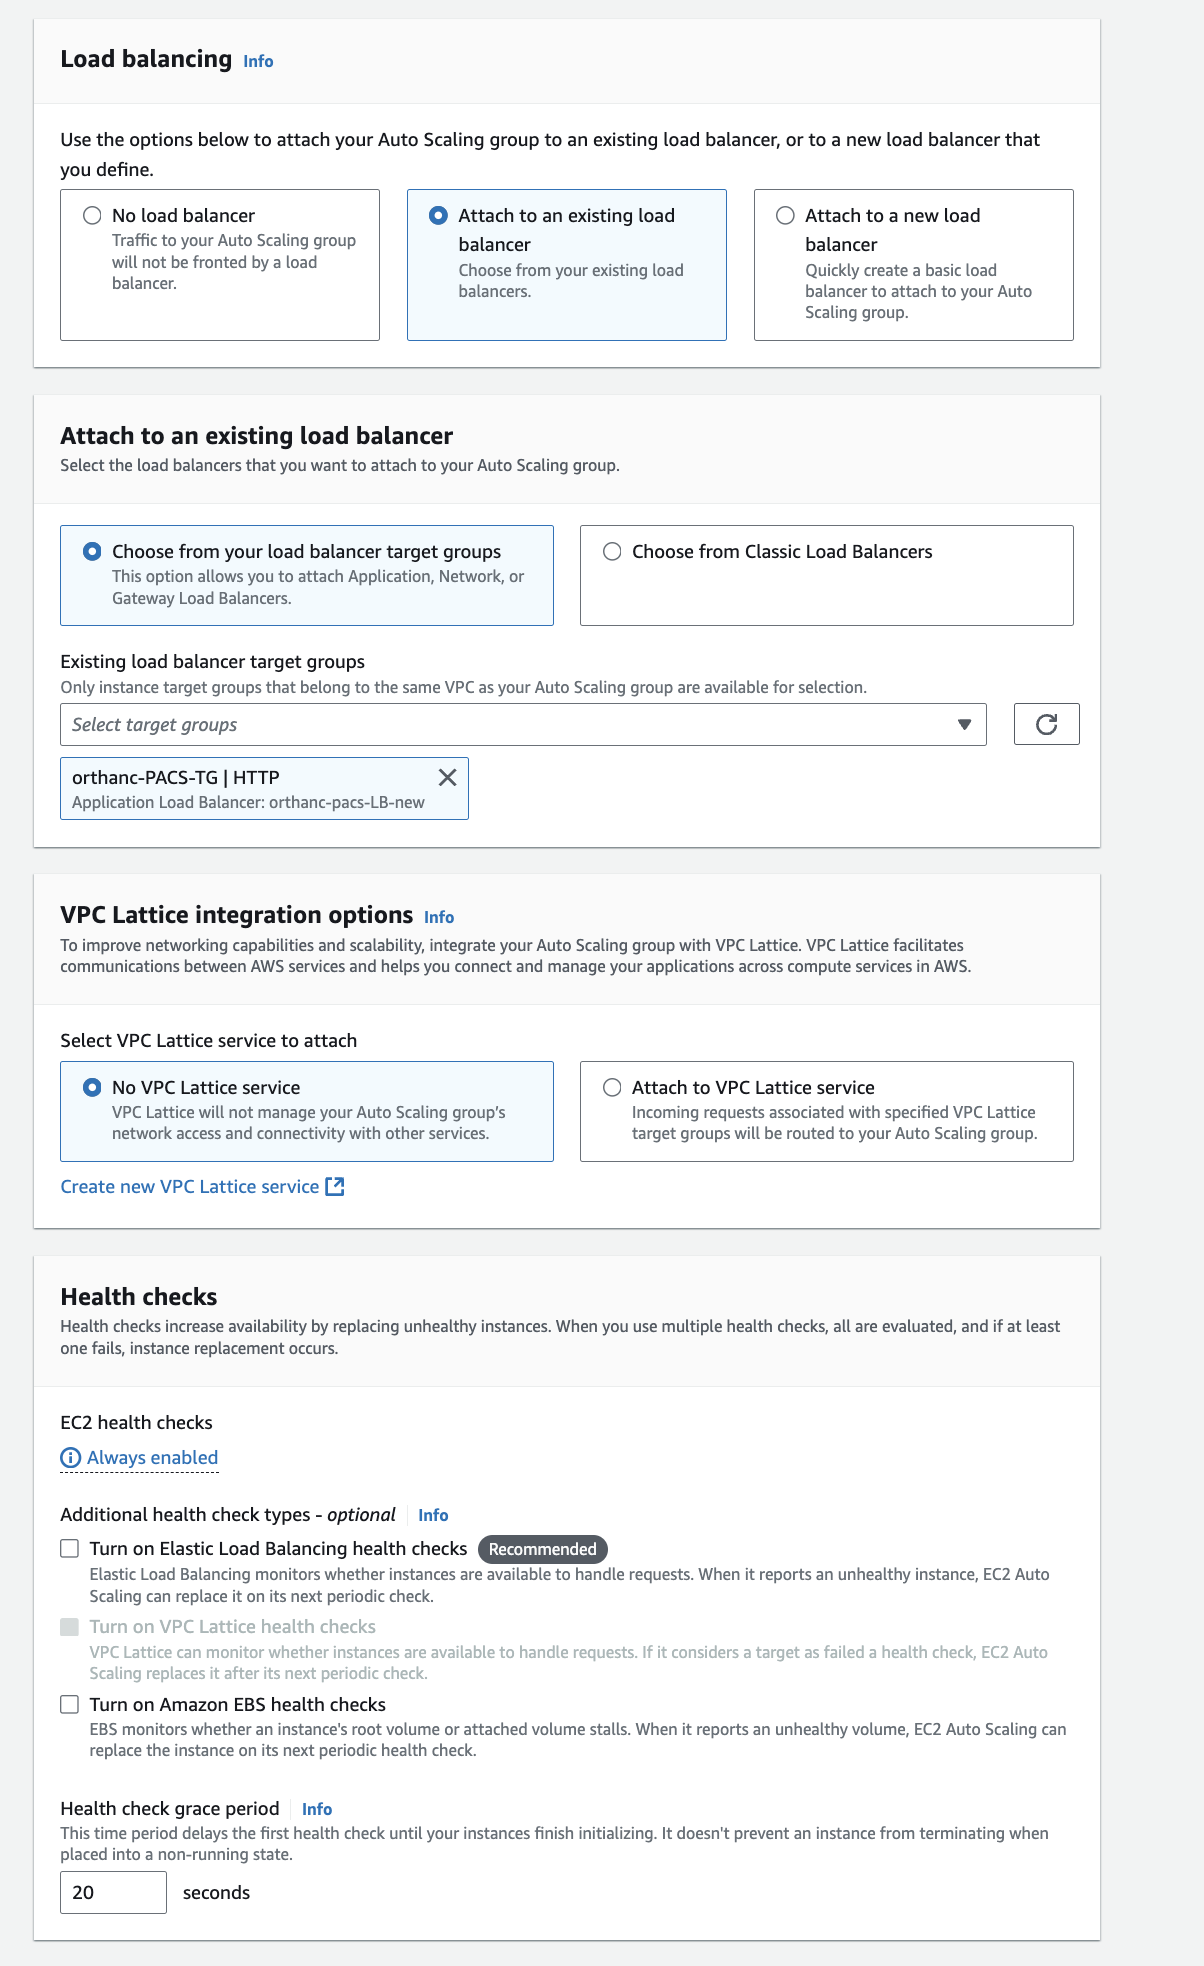
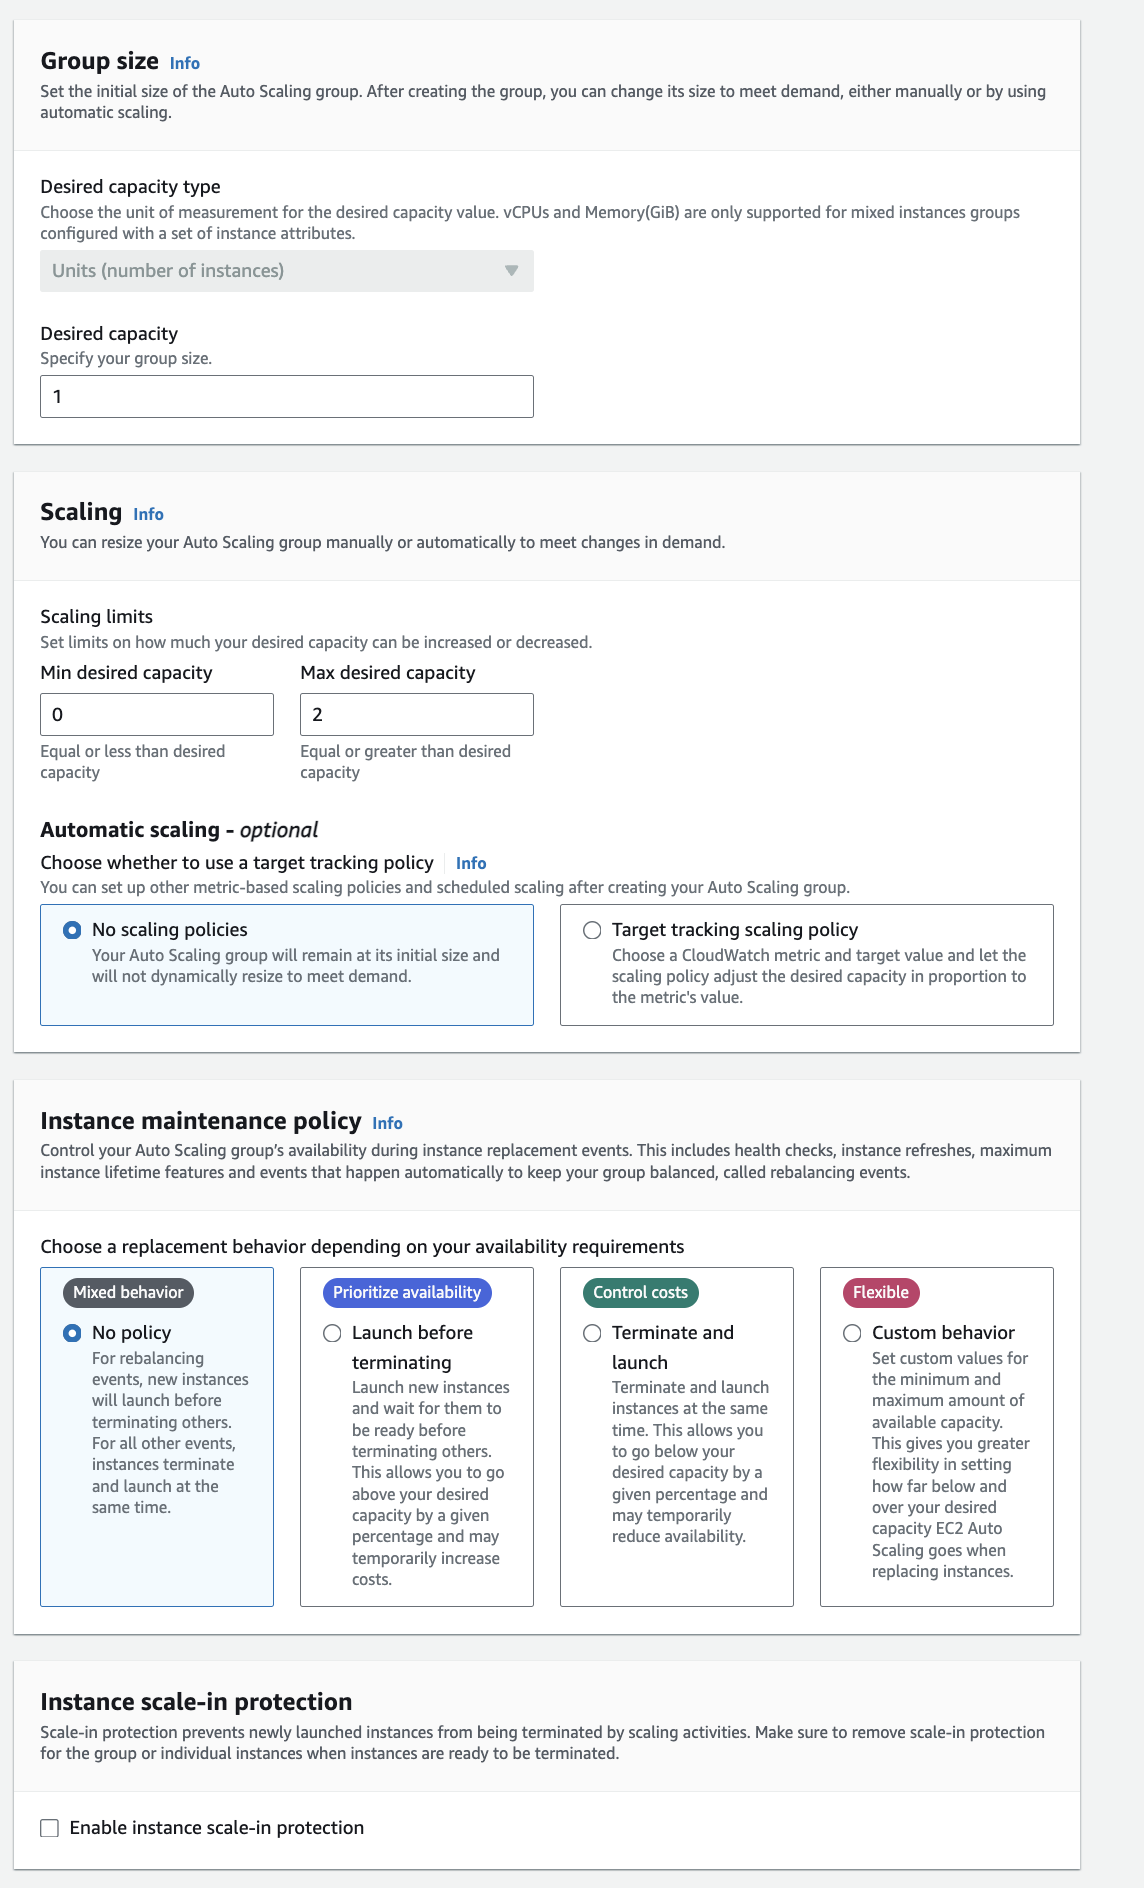
In the above screenshot since we already have one ec2 instance atachhed to our target group, we have set the min desired capacity to 0 because 1 instance is already there to handle the request in case when this has to scale this can however go to max 3 which means (1 we aready have + 2 from auto scaling)
Auto Scaling Policies
- Dynamic Scaling Policies
- Predictive Scaling
Dynamic Scaling
- If we want the ASG (Auto Scaling Group) CPU to stay at around 40% usage if anything goes beyond that it will trigger certain amount of resource.
- Or when a cloud watch alart is triggered (ex: CPU 70%), then add 2 units or when a cloud watch alarm is triggered (ex: CPU < 30%>) then remove 1
- Increase capacity at 5 PM every friday.
Predictive Scaling
This is controled by machine learning. It continuasly forecast load and schedule scaling ahead.
Scaling Cooldown
After scaling activity you go down through a phase of period of cooldown. default cooldown period is about 5 minutes (300 seconds). During this period the ASG will not launch or terminate additional instance (to allow metrics to stabalize). In order to make the configuration time (up and down time) faster it is recommended to use AMI.